WebPress Website Builder

Build a professional website that grows with your business.

Thank you so much for purchasing our item from the WebPress Website Builder.


  • Created: 18 March 2024
  • Updated: -

If you have any questions that are beyond the contents included in this help file, please then contact us via support@bytesparkle.com


INTRODUCTION

If you have purchased this item via the WebPress Website Builder and the template is being hosted on another server, then as soon as you have completed your purchase here, we will contact you to confirm the download.


Server Configuration

PHP >= v8.1
MySQL > v5.7 (MariaDB > 10.2)

Required PHP Configuration

Before installing please make sure your server meets the following requirements:

PHP Version 7 onwards;
BCMath PHP Extension;
Ctype PHP Extension;
Fileinfo PHP Extension:
JSON PHP Extension;
Mbstring PHP Extension;
OpenSSL PHP Extension;
PDO PHP Extension;
Tokenizer PHP Extension;
XML PHP Extension;
curl Extension;
zip Extension;
Your domain need to have SSL enabled;
For better performance set the below configurations as long ad possible, so that your server can process script for long time if needed. : php max_execution_time, mysql connect_timeout, mysql wait_timeout , max_allowed_packet , max_connections;
[We have auto update feature that have ability to update files from our cloud storage. Its recommended to make all the files and folders are writable(755 permission recommended) to avoid any future issue while updating;

File and Folder Permissions

Make sure you have setup the following permissions on these folders:
/bootstrap 777;
/public 777;
/storage 777;
/public/* 777;
.env 777


Installation

Follow the steps below to setup your site template:

  1. Unzip the downloaded package and open the / folder to find all the template files. You will need to upload these files to your hosting web server using FTP or localhost in order to use it on your website.
  2. Below is the folder structure and needs to be uploaded to your website or localhost root directory. These will be installed automatically:
    • Download zipped package file
    • Upload the file to your server and extract
    • Make sure the required file permissions are set as shown in the installation page
    • Run the project url (using https://) via browser and you will find a interface to provide the installation settings (https://yourdomain.com) wizard
      • Hostname : Database host name / IP (usually localhost)
      • Database Name : Create a mysql database on your host and write that name here
      • Database username : Username of the created database
      • Database password : Password of the created database
      • Admin Panel Login Email: This will be used to login as admin
      • Admin Panel Login Password : Password to log in as admin
    • Click to "Check Database Connection And Install" button. If the button is disabled meaning you do not meet all the server requirements.
  3. You should upload all or specific HTML files as per your need.
  4. You are good to go for adding your content now!

Architectural

It is a project created using Laravel and MYSQL. You can see the required folder structure and code examples below.


Route

The route structure of the project is as follows. API is not used. You can only find the necessary routes within the web file.


View

The view structure of the project is as follows. The necessary folders and view architecture have been established in the Resource. Admin, User, UI and User Frontends are in separate folders, and there are layout and pages folders in these folders.


Controller

The controller structure of the project is as follows. Necessary folders and controller architecture have been established in App/Http/Controllers. Admin, Auth, User, UserFrontends are separated into separate folders, and CRUD operations have been performed on the necessary pages in these folders.


Model

The model structure of the project is as follows. The necessary model architecture has been established in App/Models. CRUD operations and more were performed within the pages.


Database

MYSQL database was used in the project. Tables and sample table structure are as follows.


Frontend

WebPress allows you to create your website using ready-made templates without purchasing hosting and domain. You can edit these templates dynamically.

There is an area on the home page where you can edit the services you have subscriptions to. You can introduce yourself with the About Us section. There is a contact form for your visitors to contact you. They can contact you by filling out the form.

frontend

Admin

Admin Dashboard Login

You can access the admin dashboard by logging in from the login page with the login button from the root directory of your project (https://sitename.com).

The number of users registered on your website. Your total number of packages. Total number of payments processed. It is a field where you can see the number of users with subscriptions.

dashboard

Users

users

You can add users, edit and delete their roles in the users' management module.

About Us

Updates the about us text on the Frontend

Services

Updates the services text on the Frontend

Pricing

pricing

It is a module where you can edit users' packages. From here, package contents can be edited, deleted and inserted.

Payment Gateway

payment

Stripe is used as the payment method. stripe api settings should be made here

Payment Transaction

It is the module where you see the payments made by users. Payments are automatically confirmed, tracked and controlled via this module.

User Subscription

Allows you to see the packages purchased by users in detail

Contact Message

You can view the messages you receive from the front-facing contact form here.

SMTP Settings

Your smtp information; You can send mail by entering your mailer selection host, port, mail, password and encryption information.

smtp

Settings

settings

It is the module where the general settings of the site are arranged. You can customize your terms of service, logo, favicon, site name, description and background color.


User

User Dashboard

The user interface displays the remaining subscription time, website link, wallet balance and the activity status of some tools.

dashboard

Add Wallet

You can add balance to your account and make your website visible by purchasing a package from the buy now menu with the balance you have made.

dashboard

User Buy Now

You can purchase packages under the Buy now menu. The packages you purchase will make your site visible and provide you with access to the menus, so you can edit your website.

dashboard

Template

We offer 3 customized templates for your website under the template menu.

dashboard

FAQ

A FAQ is a list of frequently asked questions (FAQs) and answers on a particular topic.

You must register to the system. You can do this from the /register page. After registering to the system, you must log in. You can then update your website as you wish by loading money into your wallet and purchasing a package.
You can update your own website and add information as you wish, without any domain and hosting costs and processes. All you have to do is buy a package and you can use your website during this package. You can share your website URL from your social accounts so that your website can be accessed by those around you.
When your membership expires, your site will not be available to users. If you want to make your website active, you can buy another package with the balance in your wallet. If there is no money in your wallet, you must first add balance to the wallet.

How can I add a template

You can also add your own custom templates to the project. This is a simple process, but having some knowledge of HTML and PHP will make this job even easier. The steps to add a template and your folder structure should be as follows, step by step.

Note: The template you add must be the same or similar to existing templates in terms of structure. You will ensure that the template you add is dynamic by following the steps I have given.
A new folder should be added under the /public folder in the project root directory. For example, let's say we add the 4th template. folder as follows: /public/userFrontend_4/assets
All style files, including css and js, and img files of your template should be under this folder structure.

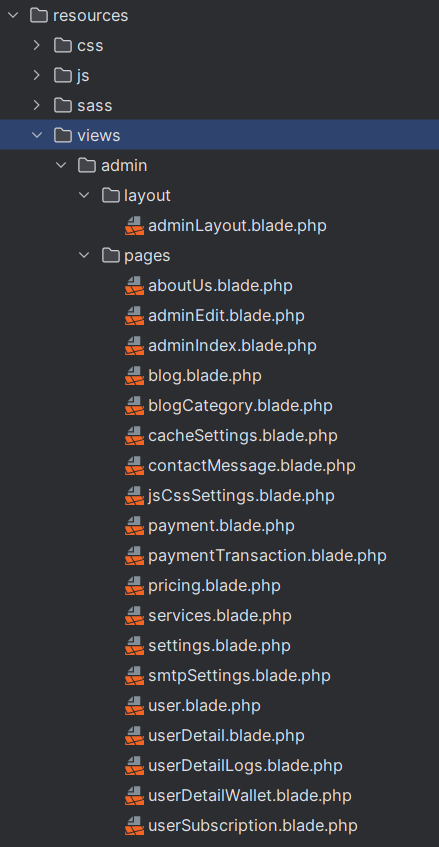
A folder structure must be created again under /resource/view. Let's name this folder userFrontend_4. Let's create two more folders under /resource/view/userFrontend_4 and name them layout and pages.

Layout.blade should be created under the /layout folder and the common parts of our HTML codes should be placed in this blade. For example: dashboard
It should be placed into this structure along with the necessary codes.
Let's add the following codes between the < head > tags in layout.blade.

dashboard
And Let's add the following code below all the css codes. @yield('css') Let's add the @yield('content') code to < body >", after < header >, that is, to its content, and at the end, let's add the following code to the bottom of all script files but inside < / body >: @yield('js')

After creating userFrontend4Index.blade in /pages, let's take the codes between < header >< /header >< footer >< /footer > here.

In this way, you will import your template. To make it dynamic, you can make it dynamic by looking at other userTemplate codes and placing them in the required field. Take reference from the previously written codes.
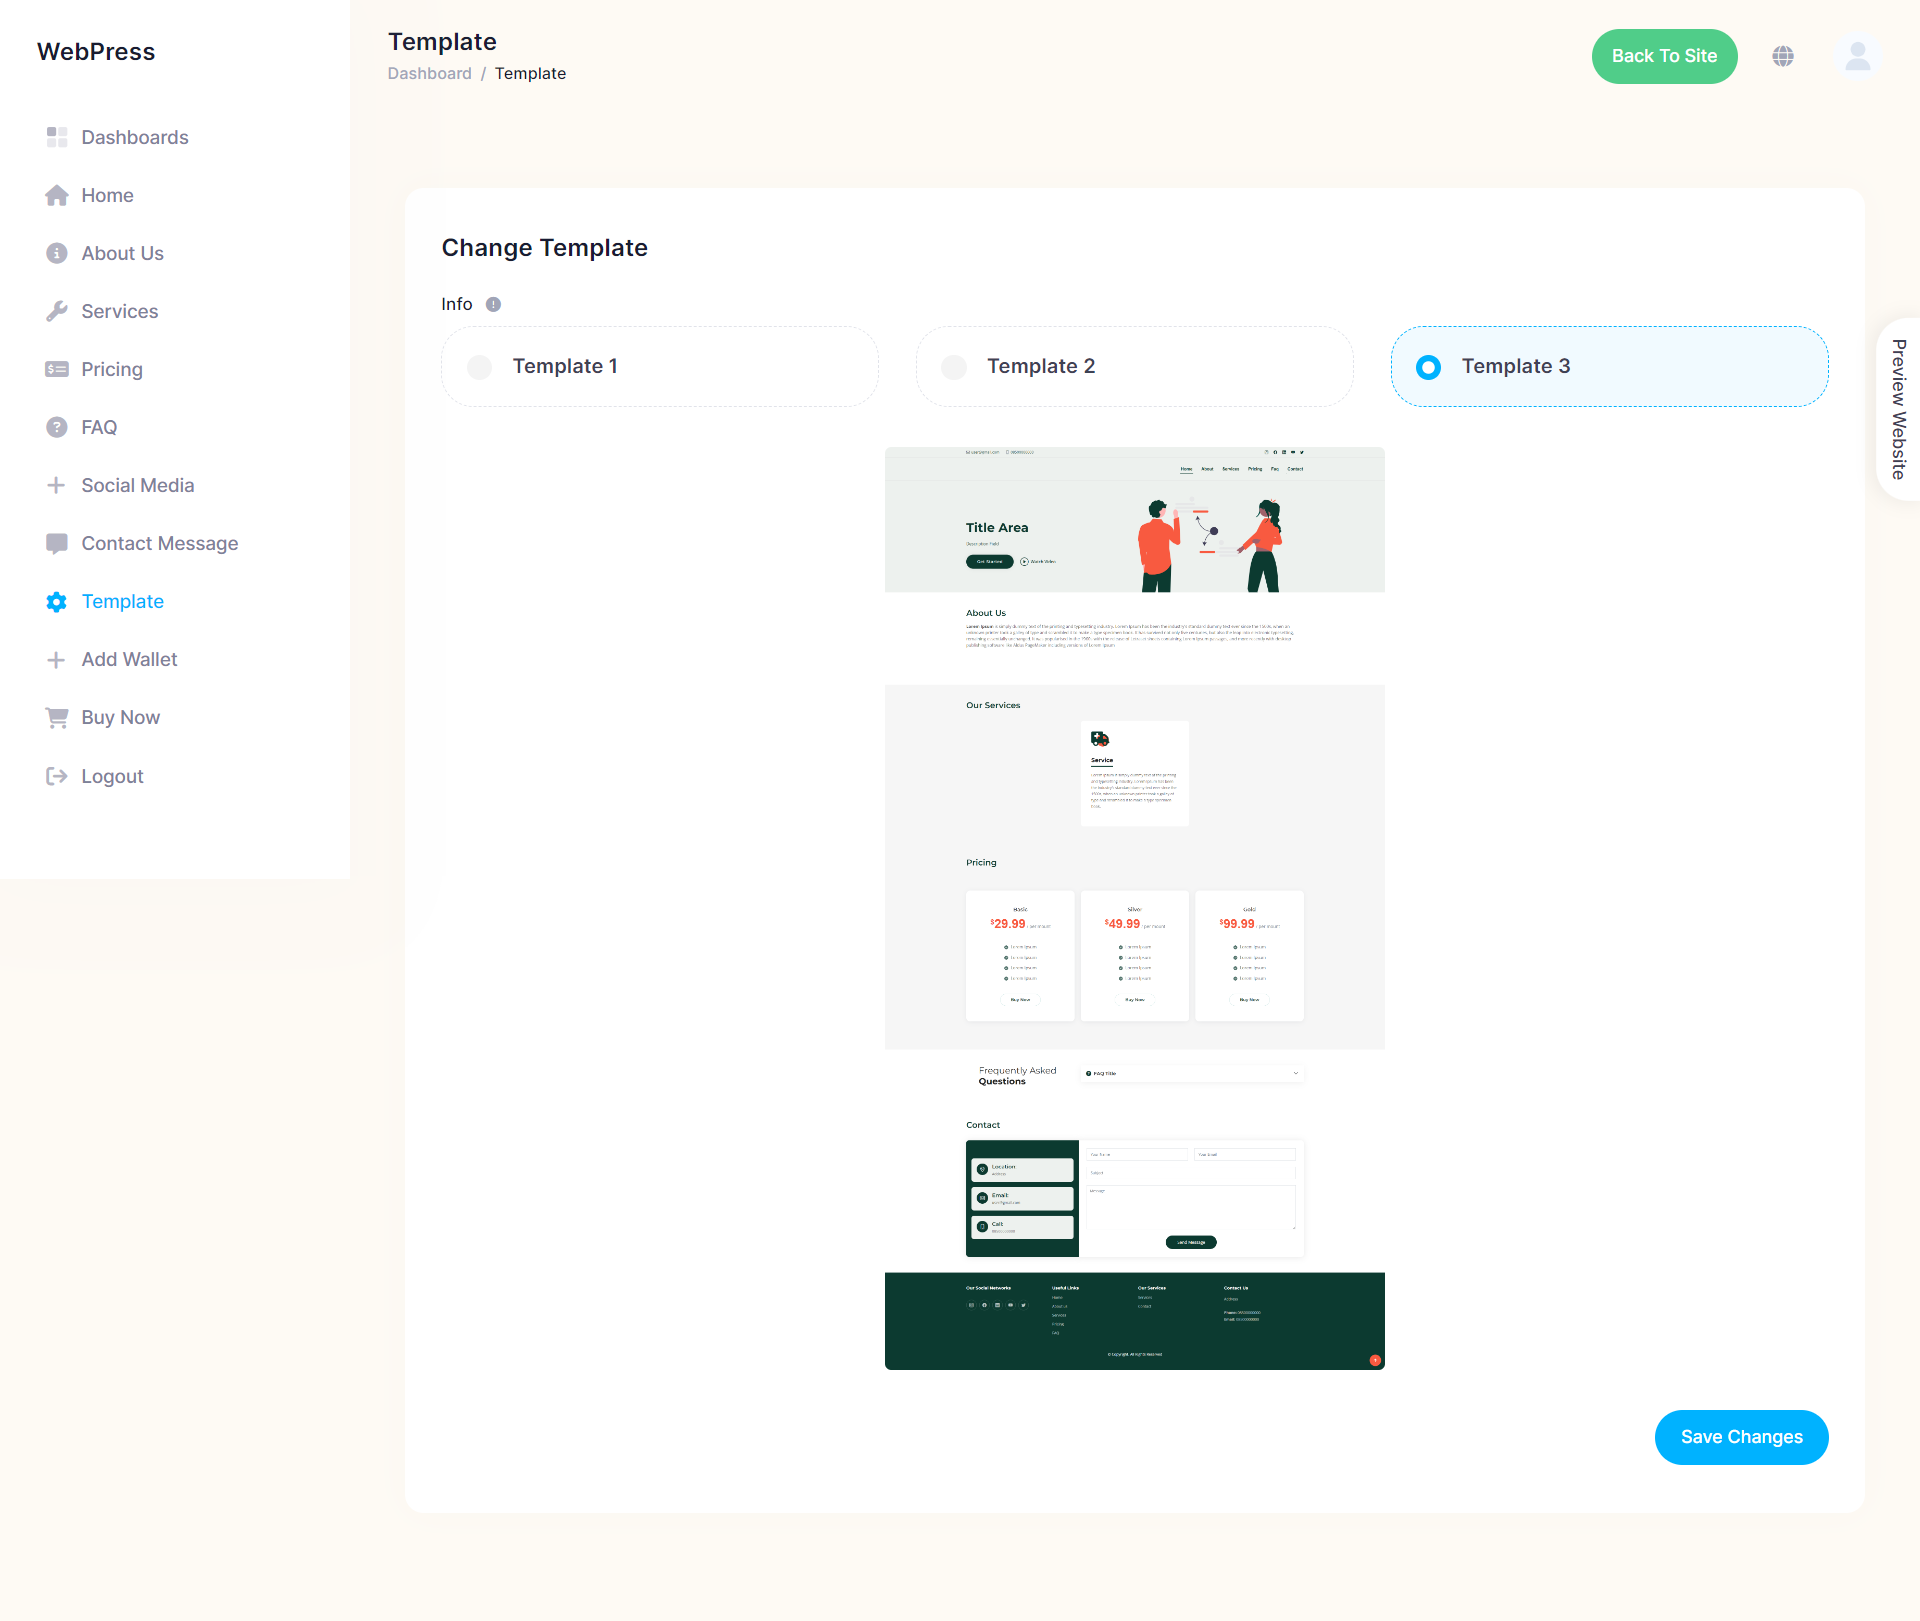
Now let's move to the user side and let the user select this template.

You must perform the operations in /resource/view/user/pages/userConfig.blade.

By following the html and php codes in the < form > here, copying and pasting the html codes for the 4th template you added, giving value="4" and creating the template photo, saving the photo in a required field under /public/userFrontend_4/assets and then .blade By defining it in you will complete the user template selection process here.

As the last step, you need to proceed with the operations on the controller side. For this, the following piece of code should be added in addition to the codes at the bottom of the 
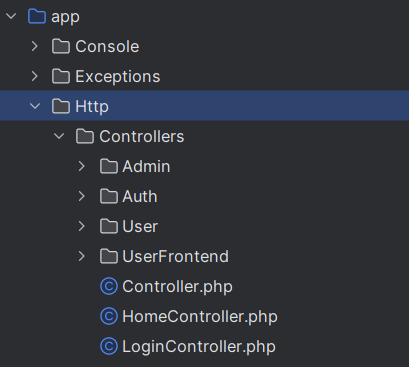
userFrontendIndex method in /app/Http/Controllers/UserFrontend/UserFrontendController.

elseif ($data['user']->template == 4) {
return view('userFrontend_4.pages.userFrontend4Index', $data);
}

By following these steps, you can add the templates you want to add in this way and reference the existing ones and make them dynamic.


Source & Credits

Images:

Fonts:

Scripts:


Support

WebPress offers no official support. The template is provided "as is" and carries no warranty or planned updates. However, if you do have questions, you can send us an email via our Item Support Page

We are located in the Istanbul GMT+3 Coordinated Universal Time (UTC). Answers or support queries during weekends, holiday periods or outside of normal working hours will be answered as soon as possible.

Note: Whilst we aim to provide a good level of support possible, please bear in mind that support is only provided for verified buyers and customers. Support does not extend to third party scripts and/or software and we will only deal with issues relating to our own templates (bugs and/or errors) that we can verify exist.

Don’t forget to Rate this template

You can add your review, give your opinion and rate our template which really helps us improve, and guides potential buyers.
Login to your Codester from there you can rate and review our script.
Thank You.

Changelog

See what's new added, changed, fixed, improved or updated in the latest versions.


Version 1.0 (18 March, 2024)

Initial Release